I found this article on MTGSalvation detailing how to turn an old booster box into an EDH box, and I immediately jumped on board.
I was proud of these, they worked and were fun.
My friend Robert M. looked at these boxes, read the article, and came back to me a couple of weeks later having improved the method tremendously. I can't take credit for his engineering, but I know I made a lot more of these than he did.
One caveat: earlier boxes are not good for this method. They have a bottom that folds up, where this method requires that the booster box have a solid bottom. I believe Champions of Kamigawa is the earliest where it has a solid bottom to the box.
And if you're viewing this in the mobile version, switch to the desktop. :D
1. Get Booster Box (if you bought a box, then celebrate first!)

2. Disassemble carefully, pulling apart at the glued sections.
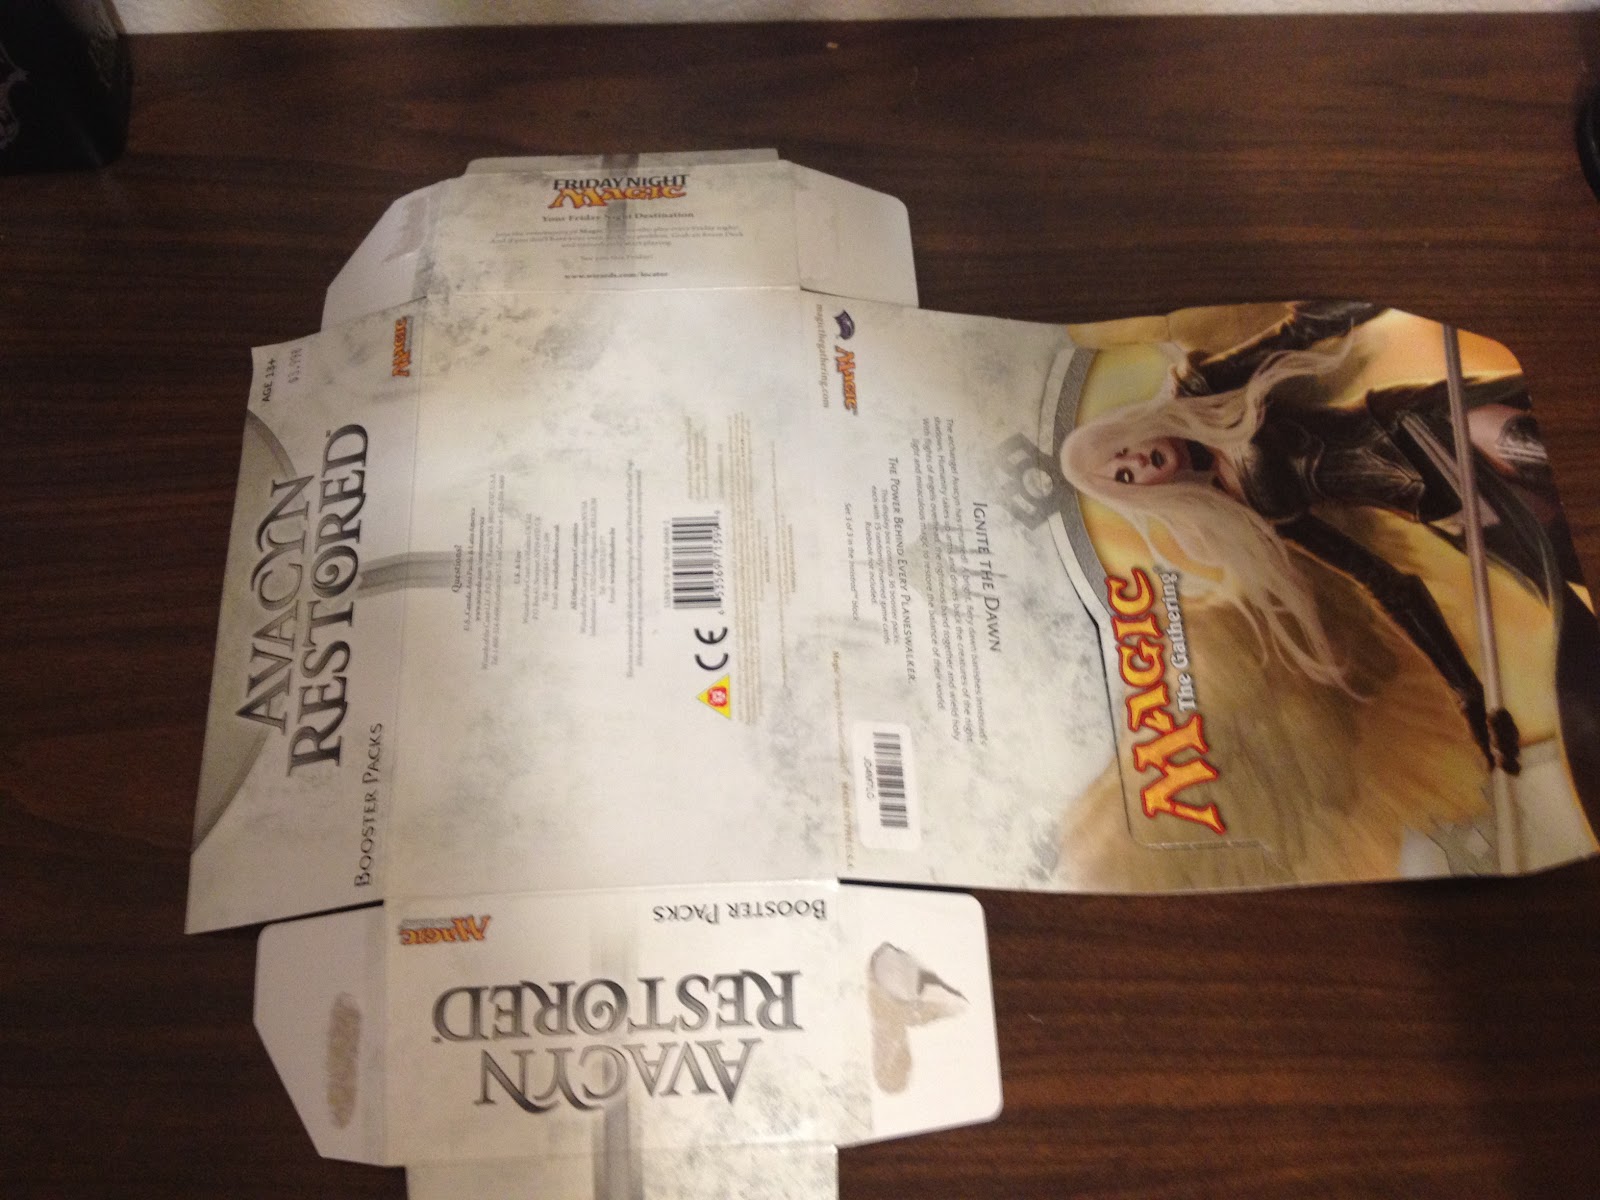
3. Remove the top part, also known as the fold-up display portion. Keep this for later.

4. Measure 2 5/8" from the short sides. I made a lot of these at one point, and so I taped an arrow onto my ruler at 2 5/8".

5. Make sure which end has the set's logo. In our finished box, one of the booster box's sides will make the outer flap, and the other will be an inner wall. It's more elegant to have the logo be on the outside, so I marked the set name on the underside too.


6. Draw your lines at the 2 5/8" marks, they should be parallel and 2 5/8" apart. If it's not perfect, don't panic. Mine weren't. :D

7. You're going to make two sets of cuts. One set is on your drawn lines, the other is perpendicular to those lines. I've marked them in red.

8. After cutting, fold the whole thing along your 2 5/8" lines. Use the ruler for an even, straight fold.

Both lines!


9. Time to make the first corner of the box. Take the FNM side and hold it up, and then put the two side flaps one over the other. Make sure the FNM's flap is on top. Use a piece of tape to hold it together.
10. Repeat on the other side.

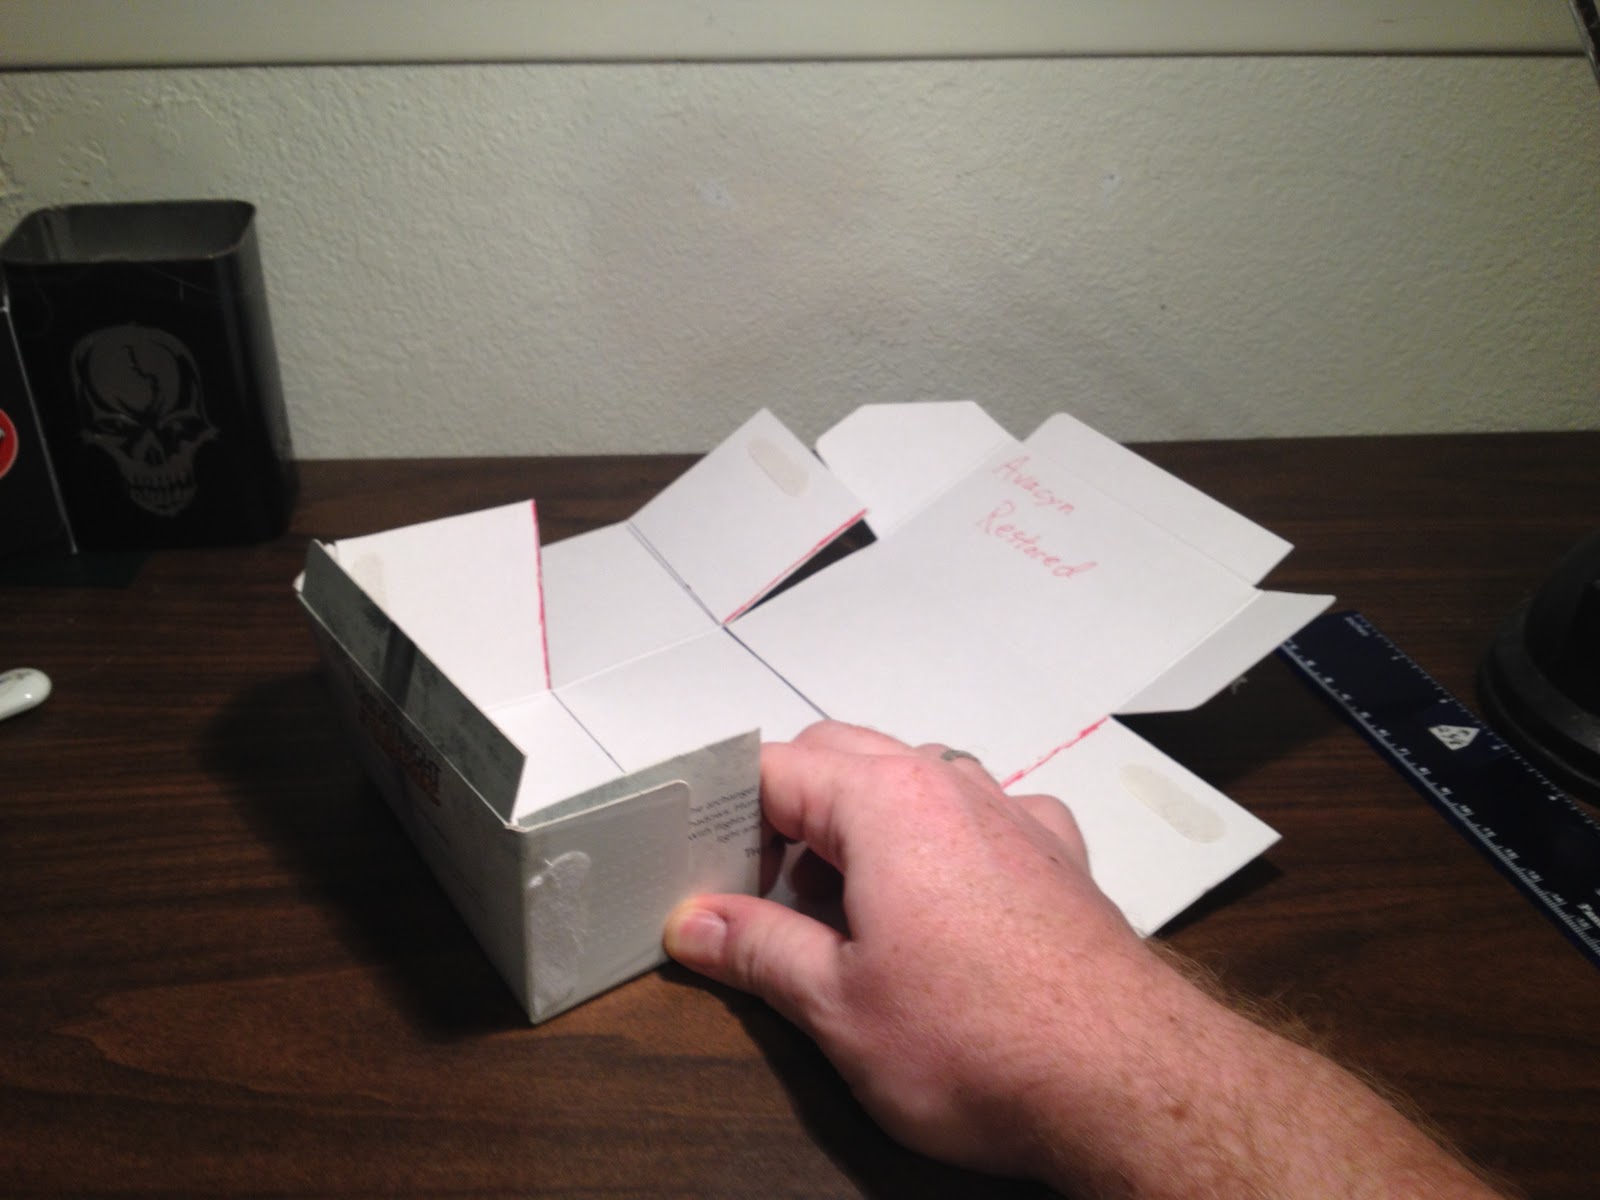
11. Now fold the back upwards. The sides should have a lot of excess, and that's about to be used. In the picture I'm just holding it together.

12. Take the parts sticking up on the sides and fold them down into the box. It should fit rather well. You can put a piece of tape at the bottom of each inward fold to hold it there, but it's not vital, as we'll be doing something else that holds it down.

13. For now, flip the box over and put tape on the bottom seam--just the bottom.

14. Your box is nearly done. You just need to trim the top flaps so they match and can slide into the slots you've created on the sides.

15. Test it out! Fold the top flap over and tuck in the two sides, and Presto! It's done. Admire your handiwork.


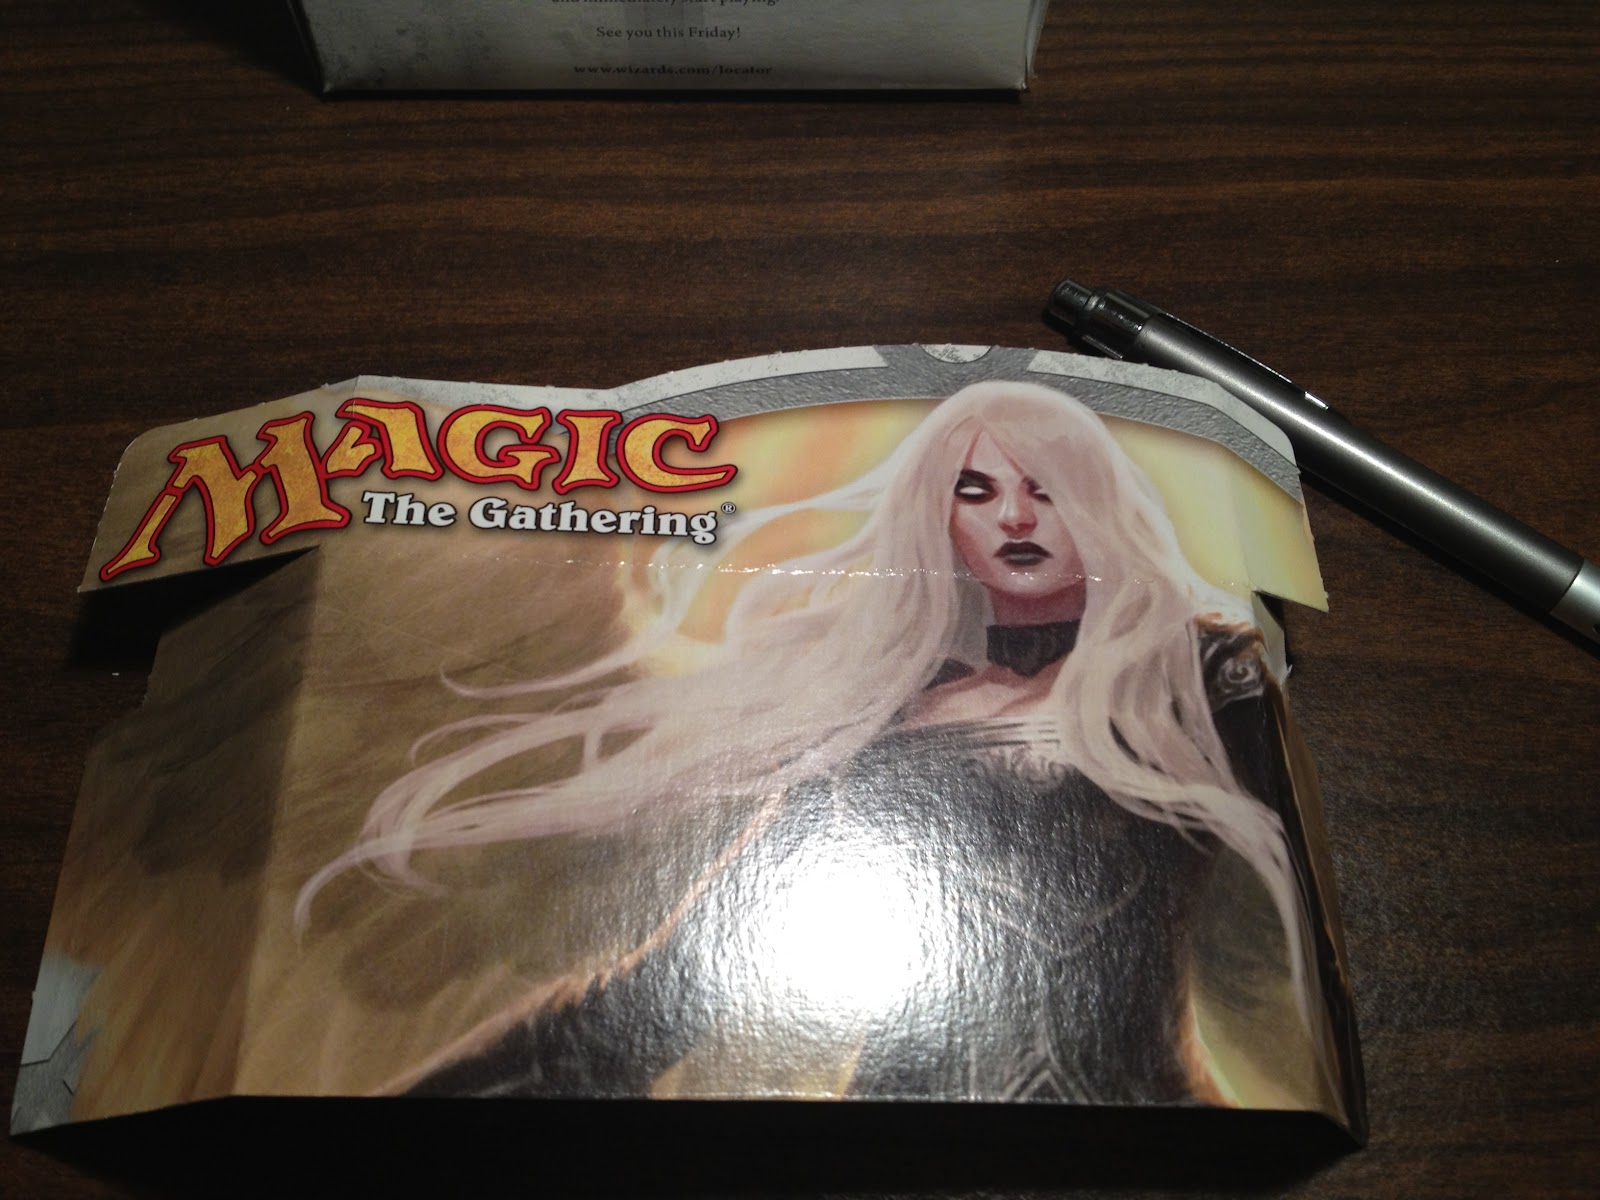
16. Now we can add a bit more stability and rigidity and even some art. Take the display portion and remove the extra outline.


17. We're going to cut and fold this so it fits into our box. We need a rectangle that is 2 5/8" tall and 4 3/4" wide. You can fiddle with the placement of this rectangle depending on your art preference, and even draw it on the front once you're adept at this.


After I measure my rectangle, I cut off the bottom piece before I start folding.

18. Fold along the edges of your rectangle, again using the ruler.

19. Make just two cuts--we're folding the rest. I like to keep the Magic logo intact, so I made a cut beneath that part, and then I folded it upwards, using a piece of tape to hold the corner.

20. Repeat on the other side, making a delightful tray.

21. This is going to be a very snug fit, but push the tray into your box. It shouldn't tear, but it will be a lot stiffer and heavier with this piece added. (Fair warning--the first time I did this, I sort of smashed it. If you do that, I've been there. Practice makes perfect!)


22. Since I have 15 decks, I use Fat Pack boxes with a divider on the inside. I like to tape a sleeve on the top to tell me what decks are in there. In this case, I am using a foil Jund Charm to represent my Adun Oakenshield deck.


23. Tape the sleeved card to the top of your new deck box. You're done! Look how well it fits!


I tried adding an inner divider for dice and such, but I found that to be unnecessary. There's not a lot of room for a deck to go sliding around, and adding dice was a little more destructive than I would have liked.
If you're more artistic than I am, you can make the deck box so that the black white side is facing out, and cover with artwork as you see fit. Draw, color, glue on other art, it's all up to you.
I had ten of these for more than a year and had no problems with breakage or damage, though the corners start looking a little rough. I eventually found that I had too many decks to use these effectively, but I hope you enjoy this.
If you have questions, please, add them in the comments so that I can make sure everyone understands how to do this.
This is awesome.
ReplyDelete-Deafbeats
It is!
DeleteMine!
ReplyDeleteThis comment has been removed by the author.
ReplyDeletemade one. Yep, works great. Excellent post. Thanks for sharing.
ReplyDeleteThis is awesome! Recycling at it's finest. Or I guess "reusing" at it's finest, but still! The next time my girlfriend says that I don't need to buy a booster box I'm going to show her this. Haha
ReplyDeleteI've made one of my own creation and it only last for probably a year. Might try to make this one. Thanks!
ReplyDeleteJust made one! This was a super easy tutorial, thanks so much for this.
ReplyDeleteThanks for the tutorial. Could you clarify your statement about the dice. Destructive to what?
ReplyDeleteI found that if I left loose dice in the top or the bottom of the box, along with the deck, that the dice would end up pushing their way into the deck, card sleeves were getting damaged, etc. The dice did a lot better thane hen I put them in a little velvet bag, that worked great.
Deleteoh, makes sense. I just folded up the bottom of the display portion to make a U-shaped division. In theory it'll keep the dice and cards separated, make the cards a bit more snug, and provide an easier way of taking just the dice out of the box.
DeleteI just did this for the first time. Works exactly as you described. Definitely a nice crafty activity after a long day. Thanks for the extremely clear steps!
ReplyDeleteOne question: do you tape the inside piece to the outside at all? It seems like you might tape the top of the inner art (Avacyn's Head) to the main box so cards don't attempt to slide behind it when you're putting the deck away. I haven't had a problem with this yet, though.
For no good reason I had saved a bunch of old boxes. I'm going to pull those out and do this to them now. I wish I hadn't thrown any of them out!
I haven't had that problem, but I suppose it's possible.
DeleteWith the inner pieces, the tension should be enough to keep it in place, but if tape helps, I would go for it.
Glad you liked it! Show it off and tell your friends!
Yeah, I don't think it will be a problem.
DeleteI put a Zendikar box together and found three older ones in my basement: Torment, Masques and Invasion. Boxes they will be! :)
... now I just need more EDH decks...
Hi! Thanks for your tutorial. I just made my own deck box :)
ReplyDeleteI made one mistake with the wings, but thankfully I had 3 boxes from Lorwyn, Shadowmoore and Tezzeret vs Elspeth :) http://imageshack.us/g/1/10145570/
This is so great. I made 3 boxes today and they are super slick :)
ReplyDeletei made my first deckbox out of an m14 booster box
ReplyDeleteMeasured development and modest materials make this shed simple to assemble and simple to manage. We'll demonstrate to you proper methodologies to assemble this shed and furnish you with the arrangements and materials show you have to begin. deck boxes
ReplyDelete